How to Install Wibiya Toolbar?
 Wibiya is one of hottest toolbar that the web has today or should I say the first toolbar that innovated and revolutionized websites and blogs.
This toolbar is often located below a sites. It floats or hangs. This can be seen on different colors depending on the preference of the owner. It come-up with search button, translation, recent posts/random posts, rss feed icon, social bookmarking sites like Facebook and Twitter, etc.

For you to install this tool, you should be invited or directly go to Wibiya Website and request for invitation. After sending your request, wait for 24 hours or even longer. They will send a notification to the email your provided to them, it has a link and a beta code.
After clicking the link, you will be prompted to a new window like this:

Provide those necessary informations. And a new window will be open.

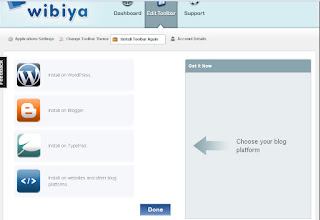
Select the color of your toolbar. And continue to click "Next". Then, you will again see this window:

Select Blogger icon with the "Install on Blogger" wordings, and since this is our platform for blogging. Don't directly proceed.

Copy the Javascript code on the "Edit Content":

1. Go to your Blogger Dashboard.
2. Click LAY-OUT/EDIT Html.
3. Just before the </body> code. Paste the javascript code.
4. Save.


didnt work!!
Hi Alex,
Have you follow the procedure? Wibiya Toolbar doesn't work immediately. You should be invited through their website. And wait for 24 hours or even longer to process your request from them. I have tried for all my blog and I haven't experienced any complication.
Just it again.
it works for me! instantly! thanks!