NEWLY ARAPAAP TEMPLATE (V2.0)
April 5, 2009
Leave a Comment
.jpg)
The first version of Arapaap Template was so basic, and has a lot of bugs so I decided to upgrade some areas and fields to make it more desirable and focus on the Feature and Posting Page.
SPECIFICATION
- Self-retrieving Feature Post
- Paginated Post
- Revised Sidebar Tab
- Single Post
If you have downloaded already the earlier version, don't worry just follow the same procedure. You just have to download the new html file because some of the CSS part were corrected and I included some codes to optimize. To those who have not yet try to upload on their blog, please follow the procedure below.
1. Go to your "LAY-OUT / EDIT HTML"
2. Click "Download Full Template", this procedure is to back-up your existing file for safety if something happen like incompatibility. After that, click "Choose File", then "Upload". If there are no errors, then proceed to the next step.
3. Save Template.
Feeds:
1. Go to "Lay-out / Edit Html".
2. Look for the code <div id='topbar'>
3. Below that above code, we can see codes like this <li><a href='http://arapaaptemplate.blogspot.com'>Content Feed</a></li>
4. Change the website address feed using your own website address feed.
5. The, Save.
SIDEBAR TABS:

Like an ordinary widget, you can simply change the title and the content.
1. Using CONTROL F in your keyboard, look for this code <div class='domtab'>
2. Change the title or add tabs as many as you want.
<li><a href='#tabone'>VIDEO</a></li>
<li><a href='#tabtwo'>POSTS</a></li>
<li><a href='#tabthree'>COMMENTS</a></li>
<li><a href='#tabfour'>LABELS</a></li>
3. After you revised the code, search this: <div id='tabs-wrap'>
4. After the searched html, copy the next codes. The quantity of titles should be the same; 'tabs_one/two/three' so as to activated all tabs that we place.
5. Then Save.
FEATURED POST:

1.Go to "Lay-out/ Page Elements"
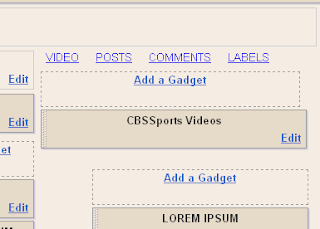
2. Look for the above photo as a guide for the field that we will fill-up.
3. If you find, click "edit" then copy-paste below codes.
<script language="JavaScript">
imgr = new Array();
imgr[0] = "http://i39.tinypic.com/4keej5.jpg";
imgr[1] = "http://i43.tinypic.com/2q2lkoz.jpg";
imgr[2] = "http://i43.tinypic.com/2ef4zrl.jpg";
imgr[3] = "http://i42.tinypic.com/2nrhkbd.jpg";
showRandomImg = true;
tablewidth = 560;
cellspacing = 10;
borderColor = "#ffffff";
bgTD = "#ffffff";
imgwidth = 250;
imgheight = 250;
fntsize = 13;
fntsize1 = 2;
acolor = "#000000";
bcolor = "#000066";
aBold = true;
icon = " ";
text = "comments";
showPostDate = false;
summaryPost = 300;
summaryFontsize = 13;
summaryColor = "#000000";
icon2 = " ";
numposts = 2;
label = "arte";
home_page = "http://arapaaptemplate.blogspot.com/";
</script>
<script src="http://www.example.com/labelhorizontal_title_below_no_021607.js" type="text/javascript"></script>
Download your .js file here. Upload it on your hosting site then replace the bolded text link.
4. Save
LABEL (Bloglist):

Just follow the procedures on my previous article HOW TO USE BLOGLIST AS A SIDEBAR
OTHER WIDGETS:
All the rest of the can be obtain from the list of the Blogger Widgets. So its up to you what kind of stuff that you want to include.


Beatifull! Great template,Thank you , i downloaded it and have it for 1 day.
thanks for visit. You may get it, it's free.