Showing posts with label Headline. Show all posts

Rumor Has It: Vodafone Philippines

February 18, 2012 0 comments

Vodafone Philippines


Vodafone has expressed its intention to cater the emerging market of the Philippines in terms of telephone services.

Through their Twitter account using an account name of VodafonePH, they have twitted a message indicating: “We are coming soon!” They have also successfully set-up some accounts in major social networking sites like Youtube and Facebook claiming the name as “Vodafone Philippines”. There are speculations from internet users that Vodafone has registered the domain address http://www.vodafone.ph.

Vodafone was the second world's largest telephone company today in terms of subscriber quantity. Some rumors that is circulating in the internet, Vodafone will be in partner with the San Miguel Corporation (SMC), the Philippines' leading food company. But both parties have not yet confirmed not denied the issue. Perhaps there could be possibilities because as it was indicated in the Philippine Constitution, any foreign company can't own 100 percent control especially if this is a public utility firm.

But who knows, this speculation might draw into fruition. This telco should be watchful with its steps in entering the local market. It will be tighter war against those who are now reigning the industry.


Stumble
Delicious
Technorati
Facebook
Digg

Wikipedia, Google, Wordpress, Diaspora, Reddit and Others are Against SOPA and PIPA

January 18, 2012 0 comments


Wikipedia, the largest online encyclopedia was covered with total darkness. This was after they announced their participation against the most controversial bill in the U.S. Government, the Stop Online Privacy Act(SOPA) and Protect IP Act (PIPA). When you're about to visit their site, you can see for a period of time their front page site but after that they redirect you another blackened page indicating their support against the bill.
“For over a decade, we have spent millions of hours building the largest encyclopedia in human history. Right now, the U.S. Congress is considering legislation that could fatally damage the free and open Internet. For 24 hours, to raise awareness, we are blacking out Wikipedia,” says the message on the page.
Meanwhile, Google has also joined the Anti-SOPA protest by covering their logo with a black rectangular size. They even created a petition site entitled "End Piracy, Not Liberty". Here, you can freely express your sentiments against the Acts.

These were some of the sites that expressed their support against SOPA and PIPA:


  1. American Express Company
  2. AOL
  3. Boing Boing
  4. BuzzFeed
  5. CloudFlare
  6. Copyblogger
  7. ConsumerBell
  8. Creative Commons
  9. Curse
  10. Daily Kos
  11. deviantART
  12. Discover
  13. Disqus
  14. DreamHost
  15. Dyn
  16. eBay
  17. Embedly
  18. Engine Advocacy
  19. ESET
  20. Etsy
  21. Facebook
  22. Fantagraphics
  23. foursquare
  24. Gandi
  25. Google
  26. GreenHostIt
  27. HostGator
  28. Hover
  29. I Can Has Cheezburger?
  30. IndieGoGo
  31. Internet Archive
  32. Irregular Times
  33. Jive Software
  34. Kaspersky Lab
  1. Kickstarter
  2. LinkedIn
  3. MetaFilter
  4. Mozilla
  5. Name.com
  6. Namecheap
  7. OpenDNS
  8. O’Reilly Radar
  9. Pastebin.com
  10. PayPal
  11. Quora
  12. Rackspace
  13. Reddit
  14. ReferralCanday
  15. Riot Games
  16. ServInt
  17. Scribd
  18. Teachers Pay Teachers
  19. Techdirt
  20. Torrentfreak
  21. Tucows
  22. Tumblr
  23. Twitter
  24. Ubu Web
  25. Uservoice
  26. Vimeo
  27. Webs, Inc.
  28. Wikipedia
  29. WordPress
  30. Yahoo!
  31. Y Combinator
  32. Zopim
  33. Zynga Game Network


Stumble
Delicious
Technorati
Facebook
Digg

Sharing Youtube Videos in Social Networking Site Diaspora

December 28, 2011 0 comments

Diaspora Front Page

I had a hard time before in sharing Youtube videos using the social networking site Diaspora. Even though I had successfully tried before to share on my previous post but I never notice that there was a right link that only recognize by this Open Source Social Network. Unlike Facebook or Google Plus that you just have to input the link in whatever form that you derive from Youtube, Diaspora has a little bit complicated.

So here is the right steps and procedures :


  • First you have to log-in on your Diaspora account:


Diaspora log-in page


  • Then go directly to Youtube.


  • Click the Share Button, and check the square option "Long Link". Copy the link with a word "watch" (e.g: http://www.youtube.com/watch?v=UNKY4EfF1zM).


Youtube Video instruction for Diaspora Open Source Social Networking Site.


Paste the link on your Diaspora Stream account and post.


Stumble
Delicious
Technorati
Facebook
Digg

Tulalip, the Microsoft leaked project

July 22, 2011 1 comments

Tulalip, the Microsoft leaked project


After Google Plus Beta penetrated the social networking race and has hit 18 millions before the official launching on July 31, 2011, Microsoft is currently brewing their own arm to topple or overthrow Facebook.

This news was confirmed when somebody on that project was carelessly published Tulalip on Socl.com. This mistake happened on July 15, 2011 which VentureBeat got the latest scoop. But immediately after the leaked, Microsoft had put-down the site to cover the issue.

They posted this statement which until now it was still there when you open it.

“Thanks for stopping by. Socl.com is an internal design project from a team in Microsoft Research which was mistakenly published to the web. We didn’t mean to, honest.”

But base on that statement, it's not clearly if this incident was really true or just a mere hoax. Some speculations also that Tulalip project will be included in Windows 8 and Windows Phone. We shall now wait until next year when the new generation of Microsoft software will takes place if this are really true.

Stumble
Delicious
Technorati
Facebook
Digg

Innovating Blogger for the Second Time

October 13, 2010 3 comments

Innovating Blogger for the Second Time

Blogger has not yet achieved the best improvements ever. After a year of collecting opinions from its subscriber, they are now again gathering suggestions and feedbacks.

Theses are some improvements that they have done for inclusion of the new Blogger.


  • New Template Designer


  • Spam Comment Filtering


  • Built-in Blog Stats


  • Improved Post Editor


  • Static Pages


  • Jump Breaks


  • Background Image Uploads


  • Accurate Post Previews


  • Photo Captions


  • More Default Templates


  • In my own opinion, here are some of the features that I want to be included and they should prioritize or focus properly;

    • Tags for every post. This will be a great help for the popularity of the blog site. Search engine will easily find every post that has the corresponding tag.
    • Storage for Javascript files. Blogger should allocate separate storage for javascript files or if not they should allow javascript files for uploading in the media listing.
    • Label with Autolink Photos. Every post with the same label will suggest a list of previous used photos.
    • Breadcrumbs. A navigational aid for the readers. This is to track what location of the site they are visiting.
    • Date on Post. Blog owner should have an option or preferences to include date on post.
    • Customized Monetization. Aside from Amazon, blog user should automatically has an Adsense account.

    Stumble
    Delicious
    Technorati
    Facebook
    Digg

    Storing Javascript File with Google Code

    April 3, 2010 3 comments


    Storing Javascript File with Google Code

    Some programmers who doesn't have web hosting encounter difficulty when the defunct Google Pages stopped their services. I admit that even me, I was pissed-off when my free templates were not running effectively due to malfunctioning of links.

    I even migrated those javascript and re-programmed the templates, uploading files and changing those links which it takes me a days to do the job.

    But my sacrifices were turned into futile because some of the javascript hosting sites have back-down also, maybe because of the traffic that they received coming from different subscribers.

    There are times also that I was a bit discourage and to stop this blog. After all, I wasn't generating a prolific income on this. My plan is to divert my time into a fruitful one.

    Its been a couple of month when I updated this site, then finally I came across Google Code. With google code you can sore files up to 2048 MB with a maximum upload size of 100MB. This was really a terrific alternative to any other sites. So I started to upload my files there.

    When visiting the site be sure that you already have a Google account or else you will register for a new one. Don't go with this link http://code.google.com/, this will only lead you to the main site of the Google Code which offer a lot of services like AJAX APIs, Android, App Engine, Google Apps Marketplace, Google Web Toolkit, Project Hosting and more. Go to http://code.google.com/hosting/ and click the green plus(+) button "Create a New Project". This will open a new window "Create Project". Fill-up the required field, then click the "Create Button". Again, a new window will open, select the "Download" tab and select "New Download". From there you can upload your files with any extension like jpg, mp3, js, css, xml, doc and others.

    Stumble
    Delicious
    Technorati
    Facebook
    Digg

    Update: Arthemia Blogger V2

    January 1, 2010 22 comments

    Update: Arthemia Blogger V2

    I have received a lots of feedback about the bug of this template particularly on HEADLINE and FEATURED section. Today I will update to solve the issues.

    First, you have to re-download the updated file HERE.

    After downloading the file:
    • Log-in to your Blogger Account.
    • Go to LAY-OUT, select Edit HTML, and then click “Choose File” button.
    • Browse Arthemia Blogger V2.xml from your files.
    • Select, then click “Upload” button.

    The bug on the recent download will be superceded. Since you have labelled your post with Headline and Feature it will show automatically.

    For the sake of new visitor who wants to download this template, just follow the instructions on my previous article regarding Arthemia except for the explanation on setting-up HEADLINE and FEATURED field, they have the same format. What I have done for the update is to directly include the HTML code on the template and it doesn't need to put it as a widget. What you need now is to label the post with Headline and Feature.

    Again, thank you for dropping-by here at BLOGGER MAGAZINE TEMPLATES. Keep on visiting us or subscribe to our feeds for you to be updated on what's new here.


    Stumble
    Delicious
    Technorati
    Facebook
    Digg

    Arthemia Blogger V2 Template

    November 25, 2009 25 comments

    Arthemia Blogger V2 Template

    Arthemia Blogger V2 Template is the latest collection so far that I have today. This is also the second Wordpress conversion that I have after the first attempt of converting Structure Theme by Justine Tadlock.

    PROCEDURE AND GUIDELINES FOR INSTALLATION:


    |


    Pre-Set-up Installation Detail:

    First, be sure to download Arthemia Blogger V2.xml and check if there are no errors appearing when clicking the file.

    • Log-in to your Blogger Account.
    • Go to LAY-OUT, select Edit HTML, and then click “Choose File” button.
    • Browse Arthemia Blogger V2.xml from your files.
    • Select, then click “Upload” button.


    PHOTO DIAGRAM OF FIELDS


    INSTALLATION OF THE FIELDS:

    HBANNER:

    1. Go To LAY-OUT/ Page Element,
    2. Refer to Photo Diagram if where is Hbanner.
    3. Click Add Gadget button.
    4. Click Adsense or HTML if you have your own code.
    5. To those who have their own HTML just paste your code.
    6. Save.

    HEADLINE:

    1. Go To LAY-OUT/ Page Element,
    2. Refer to Photo Diagram if where is Headline.
    3. Click Add Gadget button.
    4. Click HTML/Javascript.
    5. Paste this code:

    <script language="JavaScript">
    imgr = new Array();


    imgr[0] = "http://jake.ilac.googlepages.com/thumb1.jpg";
    imgr[1] = "http://jake.ilac.googlepages.com/thumb2.jpg";
    imgr[2] = "http://jake.ilac.googlepages.com/thumb3.jpg";
    imgr[3] = "http://jake.ilac.googlepages.com/thumb4.jpg";


    showRandomImg = true;


    tablewidth = 570;
    cellspacing = 8;
    borderColor = "#ffffff";
    bgTD = "#ffffff";

    imgwidth = 300;
    imgheight = 250;

    fntsize = 22;
    fntsize1 = 6;
    acolor = "#3C78A7";
    bcolor = "#3C78A7";
    ccolor = "#000000";
    aBold = true;
    icon = " ";

    text = "comments";

    showPostDate = true;

    summaryPost = 500;
    summaryFontsize = 12;
    summaryColor = "#000000";
    icon2 = " ";
    numposts = 1;

    label = "Headline";

    home_page = &quot;<data:blog.homepageUrl/>&quot;;

    </script>
    <script src="http://tugot.googlecode.com/files/headline.js" type="text/javascript"></script>


    6. Save.

    Note: Be sure to label your post with "Headline" if this is for the headline section. Atleast you have 2-3 post that have this label.

    I'm also recommending that you've to host your own javascript file (headline5.js). You can save them into other javascript hosting site like (Sigmirror, Fileave, Yourjavascript and etc). After storing to those sites, just get its link and change the entire link (http://www.sigmirror.com/files/43478_usiwx/headline5.js) that I gave. You can download the javascript file here.


    FEATURED:

    1. Go To LAY-OUT/ Page Element,
    2. Refer to Photo Diagram if where is Featured.
    3. Click Add Gadget button.
    4. Click HTML/Javascript.
    5. Paste this code:

    <script language="JavaScript">
    imgr = new Array();


    imgr[0] = "http://jake.ilac.googlepages.com/thumb1.jpg";
    imgr[1] = "http://jake.ilac.googlepages.com/thumb2.jpg";
    imgr[2] = "http://jake.ilac.googlepages.com/thumb3.jpg";
    imgr[3] = "http://jake.ilac.googlepages.com/thumb4.jpg";


    showRandomImg = true;


    tablewidth = 300;
    cellspacing = 3;
    borderColor = "#ffffff";
    bgTD = "#ffffff";

    imgwidth = 100;
    imgheight = 70;

    fntsize = 11;
    fntsize1 = 2;
    acolor = "#3C78A7";
    bcolor = "#000000";
    ccolor = "#000000";
    aBold = true;
    icon = " ";

    text = "comments";

    showPostDate = true;

    summaryPost = 0;
    summaryFontsize = 8;
    summaryColor = "#000000";
    icon2 = " ";
    numposts = 4;

    label = "Feature";

    home_page = "<data:blog.homepageUrl/>";

    </script>
    <script src="http://tugot.googlecode.com/files/featured.js" type="text/javascript"></script>

    6. Save.

    Note: Be sure to label your post with "Feature" if this is for the featured section. Atleast you have 5-6 post that have this label.

    I'm also recommending that you've to host your own javascript file (featured.js). You can save them into other javascript hosting site like (Sigmirror, Fileave, Yourjavascript and etc). After storing to those sites, just get its link and change the entire link (http://www.sigmirror.com/files/43477_r7g0l/featured.js) that I gave. You can download the javascript file here.


    LABEL DESCRIPTION:

    1. Go to LAY-OUT/ Edit HTML.
    2. Click "Expand Widget Templates".
    3. Using Control F in your keyboard, locate this code:

    <div class='cat-1'>

    4. If found, change bold text code on your own links and details:

    <b:section class='category' id='cat-1' showaddelement='no'>
    <b:widget id='Text3' locked='false' title='template' type='Text'>
    <b:includable id='main'>
    <!-- only display title if it's non-empty -->
    <b:if cond='data:title != &quot;&quot;'>
    <h2 class='title'><a href='http://magazine-templates.blogspot.com/search/label/Template'><data:title/></a></h2>
    </b:if>
    <div class='widget-content'>
    <a href='http://magazine-templates.blogspot.com/search/label/Template'><data:content/></a>
    </div>


    5. Please be careful on displaying links(http://magazine-templates.blogspot.com/search/label/Template), this are case sensitive. You should know the label of your posts before editing. And also don't forget to change the title (title='template'), this will be the one to show up. Do this method on the rest of the label description.

    6. Save.

    SIDEBAR ADS:

    Just follow the method on HBANNER. They are on the same set-up.

    OTHER FIELDS (Rest of the Sidebars):

    The set-up of this fields will depend on your choices, since this are widgetized, you're free to choose whatever kind of informations you have to put.

    -----

    I hope you will like this Blogger conversion, come back next time for another theme and please subscribe to my feeds to keep you updated. Just keep in touch and keep those infos intact on the template, it will be a token for my hard works.

    Stumble
    Delicious
    Technorati
    Facebook
    Digg

    Text Shadowing

    October 10, 2009 2 comments

    Text Shadowing
    Text shadowing is one of the rarely use decoration for fonts of a website and sometimes they come unnoticeable when incorporated into a site.

    A shadow on a text makes the title easy to read and view by the reader, they catch attention and looks prettier than a normal font.

    Adding text shadow does not takes you a couple of minutes. With just one line of html code you can make the font different from the other.

    Here is a complete sample:

    text-shadow: #FFFFFF 2px 2px 2px

    Explanation:

    #FFFFFF - color of the shadow (be sure to make it different from the existing font and also consider the background so that you can see the effect).

    2px 2px 2px - this are the distance of the shadow. The arrangement of the code is 2px on the top, 2px on the right and 2px on the bottom.

    Stumble
    Delicious
    Technorati
    Facebook
    Digg

    Introducing Premium Magazine IV

    July 27, 2009 16 comments

    Premium Magazine IV

    FEATURES:

    • FrontPage and Single Page
    • Auto Summary, Autoreadmore and Thumbnail Post
    • Featured Articles.
    • Related Post Widget
    • Printer Friendly
    • Breadcrumbs
    • Drop Cap
    • Social Bookmarking Buttons
    • PDF Conversion Articles
    • Best viewed using Firefox 3.5.1, Google Chrome 2, Opera 10, Safari 4 and Internet Explorer 8+


    PROCEDURE AND GUIDELINES FOR INSTALLATION:

    screenshot

    |


    Overview:

    Premium Magazine IV Template was conceived using the previous Premium Mag III. The basic CSS and HTML was being re-used but were improved and re-structured. Some were deleted and added new features. The dimensions of the template was tested to be fitted for the latest browsers in the cyberspace.

    Now, I'm also hosting those javascript files. I have notice that some who have use my templates have a problem in dealing with this files, so I'm kind for this template to share my own hosting site. But I'm advising you to host your own, so that you will not encounter any problem when my traffics will get bad due to loaded subscribers.


    Pre-Set-up Installation Detail:

    First, be sure to download premag4.xml and check if there are no errors appearing when clicking the file.

    • Log-in to your Blogger Account.
    • Go to LAY-OUT, select Edit HTML, and then click “Choose File” button.
    • Browse premag4.xml from your files.
    • Select, then click “Upload” button.


    INSTALLATION OF THE FIELDS:


    TOPBARMENU

    • Go to LAY-OUT, Edit HTML
    • Using Control F in your keyboard, find <div id="topbarmenu">
    • Replace all links and codes.
    • Save


    FEATURED ARTICLES:

    When posting an articles and you think you want to feature this, be sure to use a label "Feature". The field will automatically pick-up this.

    FEEDS:

    • Go to LAY-OUT, Edit HTML
    • Using Control F in your keyboard, find all this codes:

    <li><a href="http://your-blogname.blogspot.com/">Content Feed</a></li>
    <li><a href="http://your-blogname.blogspot.com/?feed=comments-rss2">Comment Feed</a></li>

    • Replace YOUR-BLOGNAME with your own link.
    • Save


    DROP CAP:

    Drop Cap is a big letter that found on the first part of a paragraph or a sentence. It is not often use to a blog or even in a website, but with this template I manage to incorporate this feature.

    • Go to SETTING, select “Formatting”.
    • Add this codes on the Post Template:

    <span class="drop-cap">

    </span>

    • Save

    When you post an article, be sure to embed the first letter between those two (2) codes:

    <span class="drop-cap">T </span>he quick brown fox�.

    Stumble
    Delicious
    Technorati
    Facebook
    Digg

    Premium Magazine III

    June 15, 2009 4 comments

    Premium Magazine III, Blogger Magazine Templates


    FEATURES:

    • FrontPage and Single Page
    • Auto Summary, Autoreadmore and Thumbnail Post
    • Continues Scrolling Featured Articles.
    • Related Post Widget
    • Printer Friendly
    • Breadcrumbs
    • Drop Cap
    • Social Bookmarking Buttons
    • PDF Conversion Articles
    • Best viewed using Firefox 3, Google Chrome, Opera, Safari and Internet Explorer 8+

    PROCEDURE AND GUIDELINES FOR INSTALLATION:

    |


    Overview:

    O bviously Premium Magazine III Template is a child theme of my previous template Premium Magazine II, but still there are new features that I included and I have also minimize the use of javascript on some of the sidebars.

    It is also my first time to use these kinds of color combinations, a darker shade as the body background and plain white on the main body with a touch of royal blue.

    Pre-Set-up Installation Detail:

    First, be sure to download PreMag3.rar and check if there are no errors appearing when clicking the file.
    • Unzip the file on a separate folder.
    • Upload Javascript and CSS File in a credible hosting site. We’ll hotlink these files later. (Javascript File: autoreadmore.js, jd.gallery.js, jd.gallery.css, mootools.v1.11.js, Relatedposts.js,)
    • Now, Log-in to your Blogger Account.
    • Go to LAY-OUT, select Edit HTML, and then click “Choose File” button.
    • Browse PreMag3.xml from the unzipped folder.
    • If found, select it then click “Upload” button.

    INSTALLATION OF THE FIELDS:

    MENUCONTAINER:


    • Go to LAY-OUT, Edit HTML
    • Using Control F in your keyboard, find <div id='menucontainer'>
    • Replace all links and codes.

    Menucontainer: <li><a expr:href='/'> HOME </a></li>
    • Save

    FEATURE ARTICLES:


    • Go to LAY-OUT, Edit HTML
    • Using Control F in your keyboard, find all this codes:

    <script src='http://HOSTING-SITE-LINK/Relatedpost.js' type='text/javascript'/> <script type='text/javascript'> var thumbnail_mode = &quot;no-float&quot; ; summary_noimg = 300; summary_img = 280; img_thumb_height = 150; img_thumb_width = 150; </script>

    <script src='http:// HOSTING-SITE-LINK /autoreadmore.js' type='text/javascript'/>

    <script src='http:// HOSTING-SITE-LINK /mootools.v1.11.js' type='text/javascript'/>

    <script src='http:// HOSTING-SITE-LINK /jd.gallery.js' type='text/javascript'/>

    <link href='http:// HOSTING-SITE-LINK /jd.gallery.css' media='screen' rel='stylesheet' type='text/css'/>


    • Replace all bold text by copying links of the Javascript and CSS file that we uploaded earlier.
    • Again using Control F in your keyboard, find this codes: <div id='myGallery'>

    • Below that, you will see:

    <div class='imageElement'>

    <h2>1914 translation by H. Rackham</h2>

    <p>On the other hand, we denounce with righteous indignation and dislike men who are so beguiled and demoralized by the charms of pleasure of the moment...</p>

    <a class='open' href='http://premium-mag2.blogspot.com/2009/05/1914-translation-by-h-rackham.html' title='Read More'/>

    <img alt='' class='full' src='https://blogger.googleusercontent.com/img/b/R29vZ2xl/AVvXsEhtlrjfG3UmVcqeIlyOQaOYIMQl-j2UPNbtu4LiOjmSZR0KCaFoR7BUmCAwPUBrzcQp6WqbtLBuWrGBYJU1MZOV0d5F-ZAHu-A6PAzTubB7RbJazSpVcgJOwdMqa71qPjwGuCpNGstpNLs/s1600/P1060030.JPG'/>

    <img alt='' class='thumbnail' src='https://blogger.googleusercontent.com/img/b/R29vZ2xl/AVvXsEhtlrjfG3UmVcqeIlyOQaOYIMQl-j2UPNbtu4LiOjmSZR0KCaFoR7BUmCAwPUBrzcQp6WqbtLBuWrGBYJU1MZOV0d5F-ZAHu-A6PAzTubB7RbJazSpVcgJOwdMqa71qPjwGuCpNGstpNLs/s150/P1060030.JPG'/>

    </div>
    • Please follow below pattern when editing the default codes and also for adding some set of this Featured Articles.

    <div class='imageElement'>

    <h2> POST TITLE </h2>

    <p> EXCERPT OF POST </p>

    <a class='open' href=' HTML LINK OF POST' title='Read More'/>

    <img alt='' class='full' src='HTML LINK OF ATTACHED PHOTOS (BIGGER SIZE)'/>

    <img alt='' class='thumbnail' src=' HTML LINK OF ATTACHED PHOTOS (SMALLER SIZE) '/> </div>
    Are you aware of the HTML code of your photos when you upload it on your post? Let us take example on one of my article.

    The HTML code of this is:

    <a onblur="try {parent.deselectBloggerImageGracefully();} catch(e) {}" href="https://blogger.googleusercontent.com/img/b/R29vZ2xl/AVvXsEhtlrjfG3UmVcqeIlyOQaOYIMQl-j2UPNbtu4LiOjmSZR0KCaFoR7BUmCAwPUBrzcQp6WqbtLBuWrGBYJU1MZOV0d5F-ZAHu-A6PAzTubB7RbJazSpVcgJOwdMqa71qPjwGuCpNGstpNLs/s1600-h/P1060030.JPG"><img style="display:block; margin:0px auto 10px; text-align:center;cursor:pointer; cursor:hand;width: 320px; height: 240px;" src="https://blogger.googleusercontent.com/img/b/R29vZ2xl/AVvXsEhtlrjfG3UmVcqeIlyOQaOYIMQl-j2UPNbtu4LiOjmSZR0KCaFoR7BUmCAwPUBrzcQp6WqbtLBuWrGBYJU1MZOV0d5F-ZAHu-A6PAzTubB7RbJazSpVcgJOwdMqa71qPjwGuCpNGstpNLs/s320/P1060030.JPG" border="0" alt=""id="BLOGGER_PHOTO_ID_5331875133339189954" /></a>
    Only that bold text is the code that we should get for hotlinking. The blue text is the size of the photo. Here are some sizes that Blogger accept for hotlinking:

    s150, s320, s400, s800 and s1600

    • Save

    FEEDS:


    • Go to LAY-OUT, Edit HTML
    • Using Control F in your keyboard, find all this codes:

    <li><a href='http://YOUR-BLOGNAME.blogspot.com'>Content Feed</a></li>
    <li><a href='http://YOUR-BLOGNAME.blogspot.com/?feed=comments-rss2'>Comment Feed</a></li>

    • Replace YOUR-BLOGNAME with your own link.
    • Save

    DROP CAP:

    Drop Cap is a big letter that found on the first part of a paragraph or a sentence. It is not often use to a blog or even in a website, but with this template I manage to incorporate this feature.

    • Go to SETTING, select “Formatting”.
    • Add this codes on the Post Template:

    <span class="drop-cap">

    </span>
    • Save

    When you post an article, be sure to embed the first letter between those two (2) codes:

    <span class="drop-cap">T </span>he quick brown fox�.

    FEATURE VIDEO:


    This field is optional or it can be replaced with other widgets that you want to include. But if you prefer to add this with your own video, then you should be familiar with the codes of embedding videos. There are lots of sites now that offer video embedding. One of them is the famous Youtube. But do you know how to customize the size of your video?

    Example:

    <object width="300" height="244"><param value="http://www.youtube.com/v/hkwN_48ycTU&hl=en&fs=1" name="movie"/><param value="true" name="allowFullScreen"/><param value="always" name="allowscriptaccess"/><embed allowscriptaccess="always" width="300" src="http://www.youtube.com/v/hkwN_48ycTU&hl=en&fs=1" allowfullscreen="true" height="244" type="application/x-shockwave-flash"></embed></object>


    Since the width of our sidebar is only 320px, make it sure also that your video should not go beyond this dimension or else it might overflow. Those bold texts on the codes are the safest sizes for this field. Take a look on the Live Demo

    ADS

    • Go to “LAY-OUT / PAGE ELEMENTS
    • Click “Add a Gadget
    • Select “Adsense” (if you don’t have a precoded ads, choose 125 x 125)
    • Or “HTML” (if you have, paste those codes.)
    • Then, Save


    FOOTER LINKS:


    • Go to LAY-OUT, select Page Element
    • Click “Add Gadget
    • Select “Bloglist” or “Link List” from the listed widgets.
    • Fill-up
    • Save


    FOLLOWERS:


    • Go to “LAY-OUT / PAGE ELEMENTS
    • Click “Add a Gadget
    • Select “Followers
    • Then, Save


    RECENT POSTS:


    • Go to “LAY-OUT / PAGE ELEMENTS
    • Click “Add a Gadget
    • Select “Feed
    • Paste this code : http://YOUR-LINK.blogspot.com/feeds/posts/default
    • Then, Save


    RECENT COMMENTS


    • Go to “LAY-OUT / PAGE ELEMENTS
    • Click “Add a Gadget
    • Select “Feed
    • Paste this code: http://YOU-LINK.blogspot.com/feeds/comments/default
    • Then, Save

    Stumble
    Delicious
    Technorati
    Facebook
    Digg

    Premium Magazine II

    May 19, 2009 6 comments

    Premium Magazine II, Blogger Magazine Templates

    FEATURES:

    • 3 Column Template
    • FrontPage and Single Page
    • Auto Summary and Thumbnail Post
    • Cascading Menus
    • Auto Label Pick-up and Feature Article
    • DOMTAB Sidebar
    • Continues Scrolling Featured Articles.
    • Related Post Widget
    • Breadcrumbs
    • Drop cap
    • Best viewed using Firefox 3, Google Chrome, Opera, Safari and Internet Explorer 8+

    |


    PROCEDURE AND GUIDELINES FOR INSTALLATION:


    Overview:

    This Premium Magazine II Template is a combination of my past two templates, the Arapaap and Structure. It was updated, enhanced and installed some powerful javascript to make it more attractive and useful to the user.

    All the areas were all “self-generating fields” after installation except for the scrolling photos which need to be updated when a new feature article was published. This field is still under development and to be upgraded on the next version.

    Pre-Set-up Installation Detail:

    First, be sure to download PreMag2.rar and check if there are no errors appearing when clicking the file.
    • Unzip the file on a separate folder.
    • Upload Javascript and CSS File in a credible hosting site. (Javascript File: autoreadmore.js, jd.gallery.js, jd.gallery.css, mootools.v1.11.js, Relatedposts.js, vertical-label.js)
    • Now, Log-in to your Blogger Account.
    • Go to LAY-OUT, select Edit HTML, and then click “Choose File” button.
    • Browse PreMag2.xml from the unzipped folder.
    • If found, select it then click “Upload” button.

    Now, you’re half-way done on installing this template.

    INSTALLATION OF THE FIELDS:

    MENUCONTAINER and LABELMENUCONTAINER:


    • Go to LAY-OUT, Edit HTML
    • Using Control F in your keyboard, find <div id='menucontainer'> and <div id='labelmenucontainer'>
    • Replace all default links and codes.

    Menucontainer: <li><a expr:href='/'> HOME </a></li>

    Labelmenucontainer: (e.g. Arts – label)

    <li><a href='#' title='View all posts filed under ....'>Arts</a>
    <ul class='children'>
    <li><a href='SUB-TITLE-LINK-ADDRESS' title='View all posts filed under .....'>Arts1</a> </li>
    <li><a href='SUB-TITLE-LINK-ADDRESS' title='View all posts filed under .....'>Arts2</a> </li>
    <li><a href='SUB-TITLE-LINK-ADDRESS' title='View all posts filed under .....'>Arts3</a> </li>
    </ul>
    </li>

    • Save

    FEATURE ARTICLES:
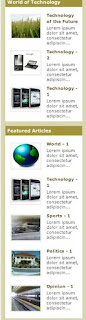

    • Go to LAY-OUT, Edit HTML
    • Using Control F in your keyboard, find all this codes:
    <script src='http://HOSTING-SITE-LINK/Relatedpost.js' type='text/javascript'/> <script type='text/javascript'> var thumbnail_mode = &quot;no-float&quot; ; summary_noimg = 230; summary_img = 200; img_thumb_height = 100; img_thumb_width = 100; </script>

    <script src='http:// HOSTING-SITE-LINK /autoreadmore.js' type='text/javascript'/>

    <script src='http:// HOSTING-SITE-LINK /mootools.v1.11.js' type='text/javascript'/>

    <script src='http:// HOSTING-SITE-LINK /jd.gallery.js' type='text/javascript'/>

    <link href='http:// HOSTING-SITE-LINK /jd.gallery.css' media='screen' rel='stylesheet' type='text/css'/>

    • Replace all HOSTING-SITE-LINK by simply copying links of the Javascript and CSS file that we uploaded earlier.
    • Again using Control F in your keyboard, find this codes: <div id='myGallery'>

    • Below that, you will see:

    <div class='imageElement'>

    <h2>1914 translation by H. Rackham</h2>

    <p>On the other hand, we denounce with righteous indignation and dislike men who are so beguiled and demoralized by the charms of pleasure of the moment...</p>

    <a class='open' href='http://premium-mag2.blogspot.com/2009/05/1914-translation-by-h-rackham.html' title='Read More'/>

    <img alt='' class='full' src='https://blogger.googleusercontent.com/img/b/R29vZ2xl/AVvXsEhtlrjfG3UmVcqeIlyOQaOYIMQl-j2UPNbtu4LiOjmSZR0KCaFoR7BUmCAwPUBrzcQp6WqbtLBuWrGBYJU1MZOV0d5F-ZAHu-A6PAzTubB7RbJazSpVcgJOwdMqa71qPjwGuCpNGstpNLs/s1600/P1060030.JPG'/>

    <img alt='' class='thumbnail' src='https://blogger.googleusercontent.com/img/b/R29vZ2xl/AVvXsEhtlrjfG3UmVcqeIlyOQaOYIMQl-j2UPNbtu4LiOjmSZR0KCaFoR7BUmCAwPUBrzcQp6WqbtLBuWrGBYJU1MZOV0d5F-ZAHu-A6PAzTubB7RbJazSpVcgJOwdMqa71qPjwGuCpNGstpNLs/s150/P1060030.JPG'/>

    </div>


    • Please follow below pattern when editing the default codes and also for adding some set of this Featured Articles.

    <div class='imageElement'>

    <h2> POST TITLE </h2>

    <p> EXCERPT OF POST </p>

    <a class='open' href=' HTML LINK OF POST' title='Read More'/>

    <img alt='' class='full' src='HTML LINK OF ATTACHED PHOTOS (BIGGER SIZE)'/>

    <img alt='' class='thumbnail' src=' HTML LINK OF ATTACHED PHOTOS (SMALLER SIZE) '/> </div>


    Are you aware of the HTML code of your photos when you upload it on your post? Let us take example on one of my article.


    The HTML code of this is:

    <a onblur="try {parent.deselectBloggerImageGracefully();} catch(e) {}" href="https://blogger.googleusercontent.com/img/b/R29vZ2xl/AVvXsEhtlrjfG3UmVcqeIlyOQaOYIMQl-j2UPNbtu4LiOjmSZR0KCaFoR7BUmCAwPUBrzcQp6WqbtLBuWrGBYJU1MZOV0d5F-ZAHu-A6PAzTubB7RbJazSpVcgJOwdMqa71qPjwGuCpNGstpNLs/s1600-h/P1060030.JPG"><img style="display:block; margin:0px auto 10px; text-align:center;cursor:pointer; cursor:hand;width: 320px; height: 240px;" src="https://blogger.googleusercontent.com/img/b/R29vZ2xl/AVvXsEhtlrjfG3UmVcqeIlyOQaOYIMQl-j2UPNbtu4LiOjmSZR0KCaFoR7BUmCAwPUBrzcQp6WqbtLBuWrGBYJU1MZOV0d5F-ZAHu-A6PAzTubB7RbJazSpVcgJOwdMqa71qPjwGuCpNGstpNLs/s320/P1060030.JPG" border="0" alt=""id="BLOGGER_PHOTO_ID_5331875133339189954" /></a>


    Only that bold text is the code that we should get for hotlinking. s320 is the size of the photo. Here are some sizes that Blogger accept for hotlinking:

    s150, s320, s400, s800 and s1600

    • Save

    • Go to LAY-OUT, Select Page Element
    • Add this code:

    <script language="JavaScript"> imgr = new Array();

    imgr[0] = "http://i39.tinypic.com/4keej5.jpg";
    imgr[1] = "http://i43.tinypic.com/2q2lkoz.jpg";
    imgr[2] = "http://i43.tinypic.com/2ef4zrl.jpg";
    imgr[3] = "http://i42.tinypic.com/2nrhkbd.jpg";

    showRandomImg = false;
    tablewidth = 199;
    cellspacing = 8;
    borderColor = "#ffffff";
    bgTD = "#ffffff";
    imgwidth = 75;
    imgheight = 65;
    fntsize = 11;
    fntsize1 = 2;
    acolor = "#5D502C";
    bcolor = "#000066";
    aBold = true;
    icon = " ";
    text = "comments";
    showPostDate = false;
    summaryPost = 50;
    summaryFontsize = 11;
    summaryColor = "#444444";
    icon2 = " ";
    numposts = 5;
    label = "Feature";
    home_page = "http://HOMEPAGE.blogspot.com/"; </script>

    <script src="http:// HOSTING-SITE-LINK /vertical-label.js" type="text/javascript"></script>


    • Replace this default codes: prefer number of post to display (numposts), your label (label), home_page; and paste the link of the javascript that you uploaded earlier.
    • Save

    Do this for the rest of the fields.

    DROP CAP:
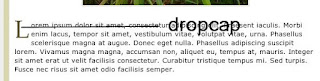

    Drop Cap is a big letter that found on the first part of a paragraph or a sentence. It is not often use to a blog or even in a website, but with this template I have manage to incorporate this feature.

    • Go to SETTING, select “Formatting”.
    • Add this codes on the Post Template:
    <span class="drop-cap"> </span>
    • Save

    When you post an article, be sure to embed the first letter between those two (2) codes:

    <span class="drop-cap">T </span>he quick brown fox�.

    FEATURE VIDEO:
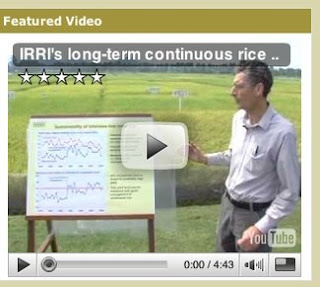
    This field is optional or it can be replace with other widgets that you want to include. But if you prefer to add this with your own video, then you should be familiar with the codes of embedding videos. There are lots of sites now that offer video embedding. One of them is the famous Youtube. But do you know how to customize the size of your video?

    Example:
    <object width="300" height="244"><param value="http://www.youtube.com/v/hkwN_48ycTU&hl=en&fs=1" name="movie"/><param value="true" name="allowFullScreen"/><param value="always" name="allowscriptaccess"/><embed allowscriptaccess="always" width="300" src="http://www.youtube.com/v/hkwN_48ycTU&hl=en&fs=1" allowfullscreen="true" height="244" type="application/x-shockwave-flash"></embed></object>

    Since the width of our sidebar is only 320px, make it sure also that your video should not go beyond this dimension or else it might overflow. Those bold texts on the codes are the safest sizes for this field. Take a look on the Live Demo.

    LINKS:
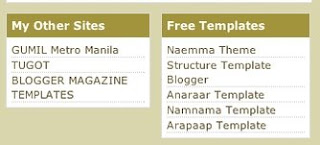

    • Go to LAY-OUT, select Page Element
    • Click “Add Gadget”
    • Select “Blog List” or “Link List” from the listed widgets.
    • Fill-up
    • Save

    SIDEBAR TABS:
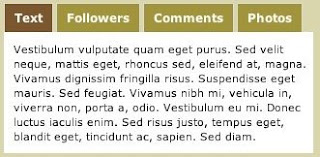

    Domtab offers a clean and multi-handle field in just one column. Tabs performs the task separately by clicking individually and they show different results accordingly.

    This field has a similarity with the above field (Links). Fill-up those tabs using the above procedure but use different widgets or even paste your own codes.

    ---
    Keep coming back, next time I will share also my next template: PREMIUM MAGAZINE I

    Stumble
    Delicious
    Technorati
    Facebook
    Digg