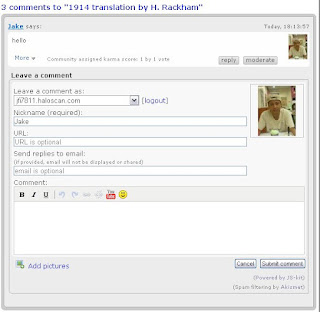
How to install JS-Kit in Blogger

When JS-Kit acquires Haloscan I have discontinued using their services because of feeling uneasiness about their services, specially when integrating this into a template. Unlike Haloscan before, there no complication of copying and pasting, it automatically update your comments.
But since Wordpress have also shifted in using this comment platform from their typical embedded comment form and they added gravatars which makes this more fitted to the subscribers, I think it would also be the right time to review it and incorporate this to my next template.
Up to now, I can't find a detailed explanation on how to install JS-Kit Comment. And I hope this article of mine can help those who are looking for a step-by-step guide.
STEPS:
1. Sign-up for free account to JS-Kit (http://js-kit.com)
2. Fill-up the require field.
3. Log-in to your new account.
4.Select "Comment" from the rest of the services they offer.
5. Click "INSTALLATION" button.
6. Under Pricing, select "JS-Kit Free".
7. Again Select "Installation" from the menu.
8. Click "add new site".
9. select the code(universal code).
10. Log-in to your Blogger Acount.
11. Go to Lay-out, Edit HTML.
12. Click "Download Full Template" button.
13. Using control F in your keyboard, search this code:
14. Replace below codes using our code that we acquire from JS-kit.
<span class='post-author vcard'>
<b:if cond='data:top.showAuthor'>
<data:top.authorLabel/>
<span class='fn'><data:post.author/></span>
</b:if>
</span>
<span class='post-timestamp'>
<b:if cond='data:top.showTimestamp'>
<data:top.timestampLabel/>
<b:if cond='data:post.url'>
<a class='timestamp-link' expr:href='data:post.url' rel='bookmark' title='permanent link'><abbr class='published' expr:title='data:post.timestampISO8601'><data:post.timestamp/></abbr></a>
</b:if>
</b:if>
</span>
<span class='reaction-buttons'>
<b:if cond='data:top.showReactions'>
<table border='0' cellpadding='0' cellspacing='0' width='100%'><tr>
<td class='reactions-label-cell' nowrap='nowrap' valign='top' width='1%'>
<span class='reactions-label'>
<data:top.reactionsLabel/></span> </td>
<td><iframe allowtransparency='true' class='reactions-iframe' expr:src='data:post.reactionsUrl' frameborder='0' name='reactions' scrolling='no'/></td>
</tr></table>
</b:if>
</span>
<span class='star-ratings'>
<b:if cond='data:top.showStars'>
<div expr:g:background-color='data:backgroundColor' expr:g:text-color='data:textColor' expr:g:url='data:post.absoluteUrl' g:height='42' g:type='RatingPanel' g:width='280'/>
</b:if>
</span>
<span class='post-comment-link'>
<b:if cond='data:blog.pageType != "item"'>
<b:if cond='data:post.allowComments'>
<a class='comment-link' expr:href='data:post.addCommentUrl' expr:onclick='data:post.addCommentOnclick'><b:if cond='data:post.numComments == 1'>1 <data:top.commentLabel/><b:else/><data:post.numComments/> <data:top.commentLabelPlural/></b:if></a>
</b:if>
</b:if>
</span>
<!-- backlinks -->
<span class='post-backlinks post-comment-link'>
<b:if cond='data:blog.pageType != "item"'>
<b:if cond='data:post.showBacklinks'>
<a class='comment-link' expr:href='data:post.url + "#links"'><data:top.backlinkLabel/></a>
</b:if>
</b:if>
</span>
<span class='post-icons'>
<!-- email post links -->
<b:if cond='data:post.emailPostUrl'>
<span class='item-action'>
<a expr:href='data:post.emailPostUrl' expr:title='data:top.emailPostMsg'>
<img alt='' class='icon-action' height='13' src='http://www.blogger.com/img/icon18_email.gif' width='18'/>
</a>
</span>
</b:if>
<!-- quickedit pencil -->
<b:include data='post' name='postQuickEdit'/>
</span>
15. Now click preview, if there are no errors then proceed.
16. Save.


Your templates and this js kit are really interesting. Keep up the good work
Thanks! :)
thank you very muck
hey bro,
i m newbie though i have blog from last 2 years,even i dont know..
can u help me in boggine...|?
i just post new topics on my blog...